
Crack Sealing Best Practices
Crack sealing is the lowest-cost-with-highest-benefit pavement preservation treatment. But just because it’s economical doesn’t mean it can be left to chance. Use these 6 tips to maximize your efforts.
1. Determine your target(s) and objectives. As effective as crack sealing is, it isn’t suitable for every type of pavement distress. Survey your target area(s) in advance. Assess types of cracking, widths of cracks (crack seal works best in cracks 1.5″ width or less), and topography issues, as well as vehicle loads/traffic. Decide areas where you’ll apply crack sealant and what you’ll need to get it done. Is there vegetation to remove with a hot air lance? Are safety cones/signage required to protect workers from traffic? What types of tooling is appropriate? How much sealant will you use? Make sure to bring everything you need to the site at the start so you can get the job done efficiently.
2. Make sure all cracks are clean and dry. To ensure maximum adhesion and longevity, start with clean, dry cracks. Water is the enemy of pavement and crack sealant. If it’s rained recently — or precipitating now — schedule work for another day. If it’s dry enough, clean cracks thoroughly to remove rocks, weeds, and dirt that will affect work. Cleaning can be done with a wire broom, compressed air, or the Crafco Crack-Vac™. You’ll also want to use a heat gun to make sure pavement is the right application temperature: 40°F and rising. If you notice excessive bubbling as you lay down sealant, that’s a sign of moisture and debris. Stop immediately and re-clean cracks before applying more material.
3. Rout, as appropriate. Routing before crack sealing can improve the likelihood of proper sealant adherence by 40% and double its service life! Crafco’s Model 30 Dust-Control Router is the perfect choice for performance and safety. Routing creates fresh, uniform edges that help sealant adhere better and a reservoir to allow thermal movement. Still, not every project should be routed. If pavement has a crack density greater than 20%, or shows fatigue cracking or other severe distress, it may not be strong enough to sustain it.
4. Use the correct sealant and maintain it properly. Sealant properties change by climate, ASTM type, viscosity, and more. As you select sealant, make sure it falls within approved spec, and that the sealant lot# is on hand in case there’s any issue. First, look at heating type. Indirect-fired and direct-fired sealants are not interchangeable. You must select them by your melter type. Next, if you swap sealant between jobs, remember to empty the tank completely before adding a different sealant, as mixing two sealants can change chemistry drastically. Finally, make sure to heat to manufacturer instructions and agitate sealant properly. Overheated or overworked material can break down, reducing pot life and causing adhesion issues. Underheated material won’t flow down to the depth of the crack. Avoid throwing in many blocks at one time, as this can reduce the temperature of the heated material in your tank and delay work. Add new material in the same amount that you’re laying it down to keep proper flow and application temperature. Too many blocks can also jam agitation paddles in certain melters.
5. Take care of your equipment. Having a good-quality melter will make your work better, easier, and safer. And maintained properly, it will last for years to come. Simple mistakes such as adding too much sealant, driving with a full tank of sealant, or driving with the burner on can wreak havoc on your machine. Use manufacturers’ guidelines for care. This includes changing your hydraulic and heat transfer oils as recommended. Old heat transfer oil can crystallize and result in a very expensive and time-consuming repair.
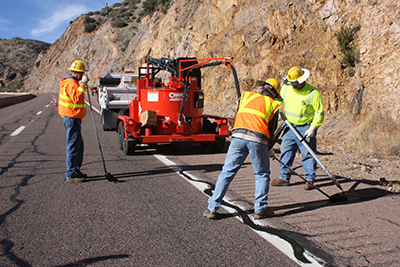
6. Follow safety protocols. Crack sealing can be done on the quietest parking lot or busiest highway. Wherever it’s performed, make sure to use proper PPE, safety cones, and other tools to reduce any hazard. You can also enhance safety through your equipment. Melters with intuitive user interfaces and automated safety controls/shutoffs can be practical if you have an inexperienced crew or higher turnover.
7. Employ good techniques. Finally, how you apply sealant can make a huge difference. Use the technique that aligns with your objectives. Flush fill if an overlay or other surface treatment is planned in the near future. Overband (max. 1/8″ thick, extending 1″ on each side of the crack) on a standalone repair. Keep the overband tight to the pavement, watch your flow, and use a squeegee to shape and force sealant into cracks for optimum performance. Don’t use more sealant than necessary as it will be messy and reduce your pavement’s skid resistance. And never try to crack-seal potholes, alligator cracks, or wide cracks (larger than 1.5″ wide). Errantly applied sealant looks unprofessional and can cost you hundreds or even thousands of dollars a year.
Finally, wherever you’re crack sealing, be safe. Wear proper PPE, use safety cones or other traffic control devices. The best crack sealing project is the safest one!